Installing cornices can transform the look of any room, adding elegance and finishing touches to walls and ceilings. While using a mitre box is a common way to cut cornices accurately, it is not always available or practical for every DIY project. Fortunately, cutting cornice without a mitre box is entirely possible with careful measurement, the right tools, and proper techniques. Learning how to make precise cuts without a mitre box allows homeowners and DIY enthusiasts to achieve professional results even with minimal equipment.
Understanding Cornice Cuts
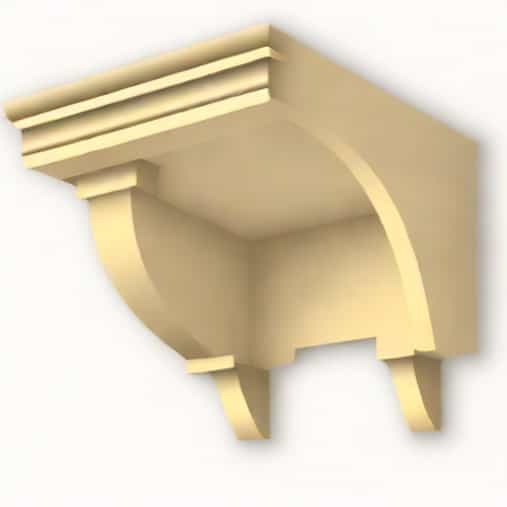
Before attempting to cut cornice without a mitre box, it is important to understand the types of cuts typically needed. Cornices usually require two main cuts internal corners, where two walls meet at 90 degrees, and external corners, where the cornice wraps around the outside of a wall. Each type of corner demands a slightly different cutting approach, and understanding the angles involved is key to achieving a seamless fit.
Internal Corner Cuts
Internal corners require cutting the ends of the cornice at complementary angles so that they fit snugly together inside the corner. Without a mitre box, achieving the correct angle requires careful marking and cutting with a handsaw or a fine-toothed saw. The angle is typically 45 degrees for a standard 90-degree corner, but slight adjustments may be needed depending on wall irregularities.
External Corner Cuts
External corners are the opposite of internal corners, with the cornice wrapping around the outside of a corner. These cuts also typically require a 45-degree angle on each piece of cornice. Ensuring the angles match perfectly is crucial for a professional-looking finish. Without a mitre box, measuring and marking the angles accurately becomes even more important.
Tools Needed for Cutting Cornice Without a Mitre Box
Even without a mitre box, having the right tools can make cutting cornice easier and more precise. Basic tools often suffice for most DIY projects, and careful preparation can reduce mistakes and wastage.
- Measuring tape or ruler to ensure accurate lengths and angles.
- Pencil or chalk for marking cut lines.
- Handsaw or fine-toothed saw for precise cutting.
- Protractor or adjustable angle guide for marking angles.
- Sanding block or file to smooth cut edges.
- Clamps to hold the cornice steady while cutting.
- Protective gloves and safety glasses for personal safety.
Step-by-Step Guide to Cutting Cornice Without a Mitre Box
By following a structured approach, cutting cornice without a mitre box can be simple and effective. Each step ensures precision and reduces the risk of errors, helping you achieve professional-looking results.
Step 1 Measure and Mark
Begin by measuring the length of the wall where the cornice will be installed. Use a pencil to mark where the cut should start and end. For corners, mark the exact point where the cornice will meet the adjacent piece. Accurate measurement is critical, as even small errors can result in gaps or misaligned edges.
Step 2 Determine the Angle
Use a protractor or angle guide to determine the correct angle for the cut. For a standard 90-degree corner, the cornice will need a 45-degree cut on each end. If the walls are not perfectly square, adjust the angle slightly to compensate. Mark the cut line along the cornice, ensuring it aligns with the measured angle.
Step 3 Secure the Cornice
Before cutting, secure the cornice on a stable surface. Use clamps or a workbench to hold it steady. A stable base prevents slipping, which can cause inaccurate cuts or damage to the cornice. Safety glasses and gloves should be worn to protect yourself during cutting.
Step 4 Cut Along the Marked Line
Using a handsaw or fine-toothed saw, carefully cut along the marked line. Take your time, maintaining a steady hand to ensure a straight and clean cut. For internal corners, cut the cornice from the top side, following the marked angle. For external corners, cut from the bottom side, maintaining the same angle orientation. Patience is essential for precision.
Step 5 Test Fit the Pieces
After cutting, place the cornice pieces in position to test the fit. Check both internal and external corners to ensure a snug connection. Minor adjustments can be made using sandpaper or a file to refine the edges. This step helps ensure that the pieces align perfectly before installation.
Step 6 Final Adjustments
If any gaps or misalignments are visible, trim the edges slightly using sandpaper or a small file. It is better to remove small amounts gradually rather than making large cuts that may ruin the fit. Attention to detail at this stage ensures a seamless appearance once the cornice is mounted on the wall.
Tips for Accurate Cornice Cutting Without a Mitre Box
Even experienced DIY enthusiasts can benefit from a few tips to improve accuracy and reduce errors when cutting cornice without a mitre box.
- Double-check measurements before cutting to avoid mistakes.
- Use light pencil lines for marking so they can be easily erased after installation.
- Practice on scrap pieces of cornice to gain confidence before cutting the actual pieces.
- Maintain a steady cutting pace to avoid jagged edges or splintering.
- Consider using a guide, such as a piece of wood clamped to the surface, to help keep the saw straight during cuts.
- Label each cornice piece to match its installation location and corner type.
Common Mistakes to Avoid
When cutting cornice without a mitre box, it is easy to make errors that can affect the final appearance. Being aware of these common mistakes helps ensure a better result.
Incorrect Angle Measurement
Assuming that all corners are perfectly 90 degrees can lead to gaps. Measure each corner carefully and adjust the cutting angle as needed. Irregular walls are common in older homes, so precise measurement is crucial.
Rushing the Cut
Hurrying the cutting process often results in uneven edges or splintering. Take your time and cut slowly and steadily along the marked lines to maintain accuracy.
Neglecting Test Fits
Failing to test-fit the cornice before final installation can lead to misaligned corners and gaps. Always check the fit first and make adjustments as necessary.
Cutting cornice without a mitre box may seem challenging, but with careful measurement, proper tools, and patience, it can be done successfully. Understanding angles, securing the cornice during cutting, and testing the fit ensures a professional finish. By following these steps and avoiding common mistakes, homeowners and DIY enthusiasts can install cornices that enhance the beauty of their rooms. Mastering this skill allows for greater flexibility and creativity in home improvement projects, proving that a mitre box is helpful but not absolutely necessary for achieving precise and elegant results.