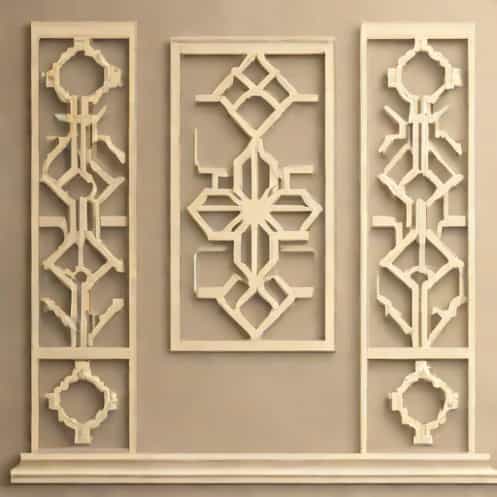
Fretwork wall panels have become an increasingly popular choice for homeowners and interior designers seeking to add texture, dimension, and a touch of elegance to walls. These decorative panels, often made from wood, MDF, or PVC, feature intricate cut-out designs that enhance any living space. Installing fretwork panels may seem challenging at first, but with careful planning, the right tools, and proper techniques, it can be a manageable DIY project. Proper installation not only ensures that the panels look visually appealing but also maintains their durability and stability over time. Understanding the materials, preparation steps, and installation methods is crucial for achieving a professional-looking finish.
Understanding Fretwork Wall Panels
Fretwork panels are essentially decorative sheets with intricate patterns, often inspired by geometric, floral, or abstract designs. They are used to create feature walls, room dividers, or ceiling decorations. Depending on the material, fretwork panels can be lightweight and easy to handle or more solid and sturdy for long-term installation. Key advantages include
- Adding aesthetic appeal and depth to plain walls.
- Allowing for ventilation or light passage in certain designs.
- Offering flexibility in placement, including full walls or partial accent areas.
- Being compatible with various finishes, such as paint, stain, or varnish.
Before beginning installation, it is important to understand the specific material properties, as this will influence the type of adhesive or fixings required.
Tools and Materials Required
Gathering the right tools and materials before starting the installation ensures a smooth process. The basic items include
- Fretwork panels (wood, MDF, or PVC) in the desired design and size.
- Measuring tape and pencil for precise placement.
- Spirit level or laser level to ensure panels are straight.
- Construction adhesive suitable for the panel material.
- Finishing nails or screws for additional support, if necessary.
- Sandpaper or sanding block to smooth edges after cutting.
- Saw or cutting tool for trimming panels to fit corners or edges.
- Paint or sealant for finishing touches.
Having all tools ready before starting reduces interruptions and helps achieve a professional installation.
Preparing the Wall Surface
Proper wall preparation is essential for a secure and lasting installation. Steps include
- Cleaning the wall thoroughly to remove dust, grease, and debris.
- Ensuring the wall is smooth and free of bumps or cracks. Fill in any holes with filler and sand smooth.
- Priming the wall if required, especially if the panels are to be painted or if the wall surface is porous.
- Measuring and marking the layout to determine where each panel will be placed, ensuring symmetry and alignment.
Careful preparation prevents installation errors and ensures the panels adhere properly to the surface.
Cutting and Customizing Panels
Fretwork panels often need to be trimmed to fit around corners, outlets, or edges. Steps include
- Measuring the area accurately to determine the correct panel dimensions.
- Marking cut lines lightly with a pencil on the panel.
- Using a fine-toothed saw, jigsaw, or rotary tool to cut along the marked lines.
- Sanding the cut edges to remove roughness and ensure a smooth finish.
Customizing panels ensures a perfect fit and maintains the overall aesthetic of the wall.
Installing the Panels
There are several methods to install fretwork wall panels, including adhesive, nails, or a combination of both. Follow these steps for a reliable installation
- Dry FitPlace the panels against the wall without adhesive to check alignment and spacing.
- Apply AdhesiveApply a strong construction adhesive evenly on the back of the panel. Avoid excess to prevent spillage through the cutouts.
- Position the PanelPress the panel firmly against the wall, ensuring it is level using a spirit or laser level.
- Secure EdgesFor heavier panels or uneven surfaces, use finishing nails or screws at the edges for extra stability.
- RepeatContinue placing subsequent panels, ensuring patterns align properly. Maintain consistent spacing between panels if required.
Patience and attention to detail during installation prevent misalignment and enhance the overall visual effect.
Finishing Touches
After installation, the panels may require finishing touches to improve appearance and durability. Consider the following
- Filling any gaps or nail holes with filler and sanding smooth once dry.
- Applying paint, stain, or sealant to match your desired look and protect the material.
- Cleaning the surface to remove adhesive residue, dust, or debris.
- Inspecting alignment and making minor adjustments if necessary.
Proper finishing ensures the panels are visually appealing and long-lasting.
Maintenance Tips
To keep fretwork wall panels looking their best, regular maintenance is important
- Dust panels regularly with a soft cloth or duster to prevent dirt buildup.
- Clean with a damp cloth occasionally; avoid excessive moisture for wood or MDF panels.
- Inspect periodically for any loosening, especially if nails or screws were used.
- Reapply finish or sealant every few years to maintain appearance and protect the material.
Following these maintenance tips prolongs the life of your panels and preserves their decorative effect.
Installing fretwork wall panels is a creative and rewarding way to enhance the aesthetics of any room. By understanding the types of panels, preparing the wall correctly, measuring and cutting precisely, and following proper installation techniques, you can achieve a professional-looking finish. Paying attention to finishing touches and maintenance ensures the panels remain attractive and durable over time. With careful planning, the right tools, and a step-by-step approach, fretwork panels can transform plain walls into stunning decorative features, adding elegance and personality to your home or commercial space.