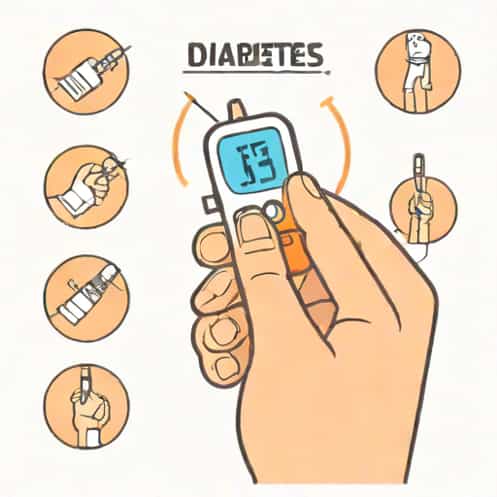
Checking blood sugar at home becomes a regular part of life for many people with diabetes, and using a diabetes finger pricker correctly helps make the process easier, cleaner, and more comfortable. Although the device itself is simple, learning proper technique can prevent unnecessary pain and ensure more accurate glucose readings. Whether you are newly diagnosed or helping someone else manage their condition, understanding how to use a finger pricker with confidence can make daily monitoring far less intimidating and far more effective.
Understanding the Finger Pricker Device
A diabetes finger pricker, also known as a lancing device, is designed to create a small, controlled puncture in the skin to obtain a drop of blood. It works together with lancets, which are tiny sterile needles used once and then safely discarded. Most modern devices allow for adjustable depth settings so users can choose the level that feels comfortable while still producing enough blood for testing.
Parts of a Standard Lancing Device
Though designs vary slightly, most finger prickers include the following components
- Lancet holderThe chamber where the lancet is inserted.
- Depth selectorA numbered dial that adjusts puncture depth.
- Cock or trigger mechanismUsed to prime and release the lancet.
- Safety capKeeps the device covered when not in use.
Knowing each part ensures that you assemble and operate the device correctly every time.
Preparing the Lancing Device
Preparation is an important step for safe and hygienic blood sugar testing. Proper setup reduces the risk of infection and ensures a smooth testing experience.
Wash Your Hands First
Clean hands help prevent contamination and ensure that the blood droplet is not diluted by lotion, dirt, or food residue. Warm water can also increase circulation, making it easier to get a proper sample.
Insert a New Lancet
Always use a fresh lancet. Reusing lancets can lead to dull tips, more discomfort, and potential skin irritation.
- Remove the cap from the finger pricker.
- Insert the lancet into the holder firmly.
- Twist off the protective cover from the lancet needle.
- Replace the cap of the device securely.
Select the Depth Setting
If you have thin or delicate skin, choose a lower depth. For thicker or calloused fingertips, increase the number slightly. Start with a medium setting and adjust as needed based on comfort and blood flow.
Using a Diabetes Finger Pricker Properly
Once your device is ready, the next steps involve positioning, lancing, and collecting a blood sample in a way that is as painless and effective as possible.
Choose the Right Spot on Your Finger
The sides of your fingertips, not the center, are the best places to lance. These areas generally have fewer nerve endings, making the process less painful while still providing adequate blood flow.
Position the Device
Hold the pricker firmly against the side of your fingertip. Keep your hand relaxed. Pressing too hard can increase pain, while pressing too lightly may prevent the lancet from reaching the skin.
Release the Lancet
Press the trigger button. You should feel a quick, slight pinch. Many devices are designed to reduce discomfort by moving the lancet in and out quickly.
Gently Massage for a Blood Drop
If a drop does not appear immediately, rub the finger gently from base to tip. Avoid squeezing too hard, as this can dilute the sample with tissue fluid and affect accuracy.
Apply the Blood to Your Test Strip
Follow the instructions for your glucose meter. Usually, you touch the edge of the test strip to the drop of blood until the meter registers a reading.
After-Care and Cleaning
Taking proper care of your lancing device keeps it functioning well and reduces health risks.
Dispose of the Lancet Safely
Remove the used lancet and place it in a sharps container or another puncture-proof container. Never throw loose lancets into regular trash.
Clean the Device
Wipe the outside of the device occasionally with a disinfecting wipe. Do not immerse it in water or use alcohol inside the mechanism.
Allow Your Finger to Heal
If necessary, press a clean tissue or cotton ball on the puncture site for a few seconds. Most marks heal quickly, but rotating fingers helps prevent soreness and callouses.
Tips for More Comfortable Finger Pricking
Many people find finger pricking uncomfortable at first, but with practice and proper technique, discomfort often decreases significantly.
Warm Your Hands Before Testing
Warm water, a gentle massage, or even rubbing your hands together increases circulation, making it easier to get a blood drop with less pressure.
Rotate Fingers Regularly
Don’t use the same finger repeatedly. Switching fingers and puncture sites helps reduce tenderness and skin thickening.
Consider Alternate Sites (if compatible)
Some devices and meters allow testing on areas such as the forearm or palm. However, these sites may not reflect rapid blood sugar changes as well as fingertip samples, so use them only when appropriate.
Use High-Quality Lancets
Thinner, factory-sharpened lancets typically cause less pain than thicker ones. Avoid expired or low-quality lancets.
Understanding Why Proper Technique Matters
Accurate glucose readings depend not only on your meter and test strips but also on how well you use your finger pricker. Poor technique can lead to inconsistent results, unnecessary discomfort, or even infection in rare cases.
Ensuring Accurate Blood Sugar Readings
If your hands are cold, if you squeeze too hard, or if the drop is too small, the test may be unreliable. Consistency helps ensure that your readings reflect your true glucose levels.
Reducing Pain and Skin Damage
Proper technique minimizes fingertip pain so you can maintain long-term testing habits without dread. This is crucial for managing diabetes effectively.
Supporting Daily Routines
When finger pricking becomes a quick, simple part of your day, it is easier to stay on track with your health goals. A well-handled lancing device contributes to steady habits and better long-term results.
Frequently Asked Questions
How often should I change my lancet?
Ideally, use a new lancet for every test. If that is not possible, change it as frequently as you can to reduce pain and ensure a clean puncture.
Why do my fingers sometimes hurt?
This can happen if you prick the center of your fingertip, use a dull lancet, or use deep settings. Adjusting technique usually helps.
Can I share a lancing device?
It is strongly discouraged. Sharing can spread infections even if the lancet is replaced. Always keep your own device.
Using a diabetes finger pricker correctly helps make blood glucose testing more accurate, more comfortable, and more manageable. With proper setup, good hygiene, and consistent technique, the process becomes routine rather than stressful. Over time, most users find that finger pricking becomes a quick, easy step in their daily diabetes care, supporting better health and more reliable monitoring.